
Step 1 - Terms of Use
When you first open the application, you will be met with a Terms of Use screen. From here you can view the Terms of Use and accept them.

Step 2 - Accept the Terms of Use
When you click “Accept Terms of Use to continue", a popup will appear asking if you accept the Terms of Use. Selecting “Cancel”, will not allow you to use the application. Selecting, “Accept”, will bring you to the home screen of the application.
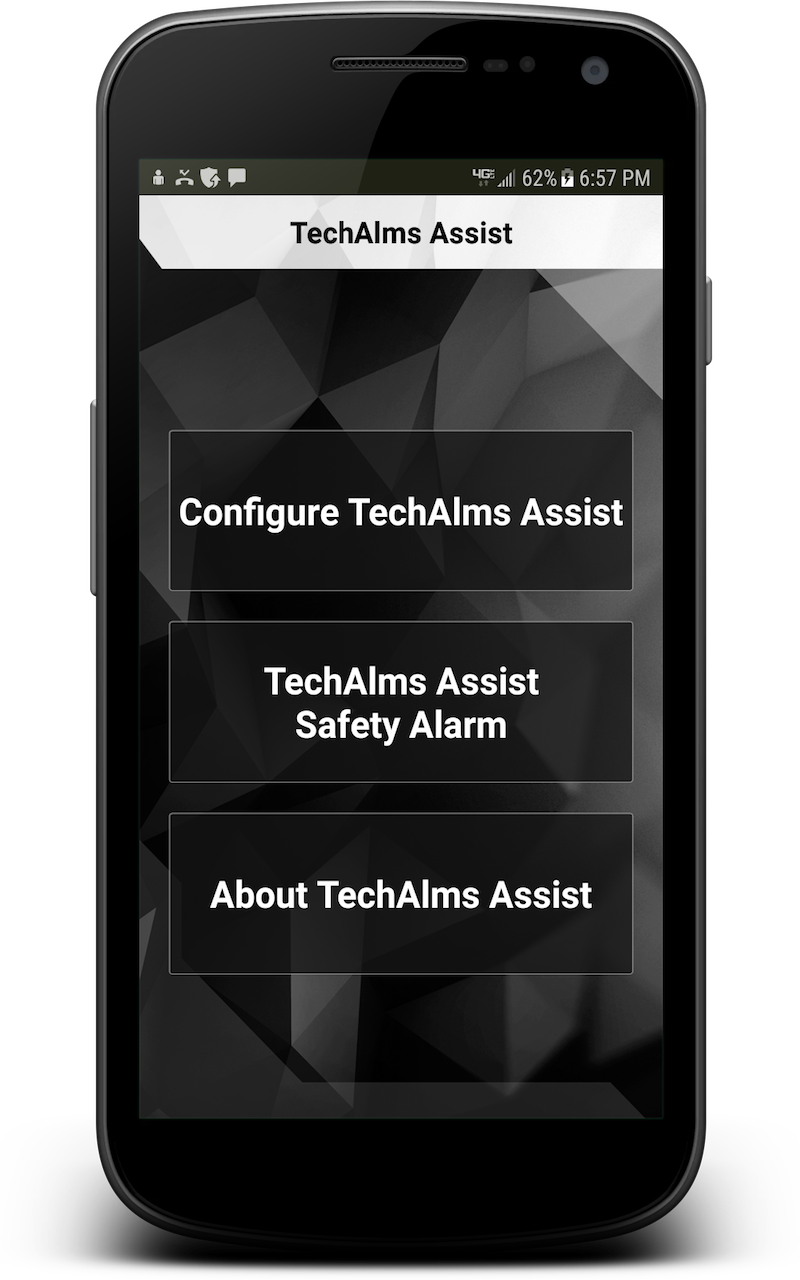
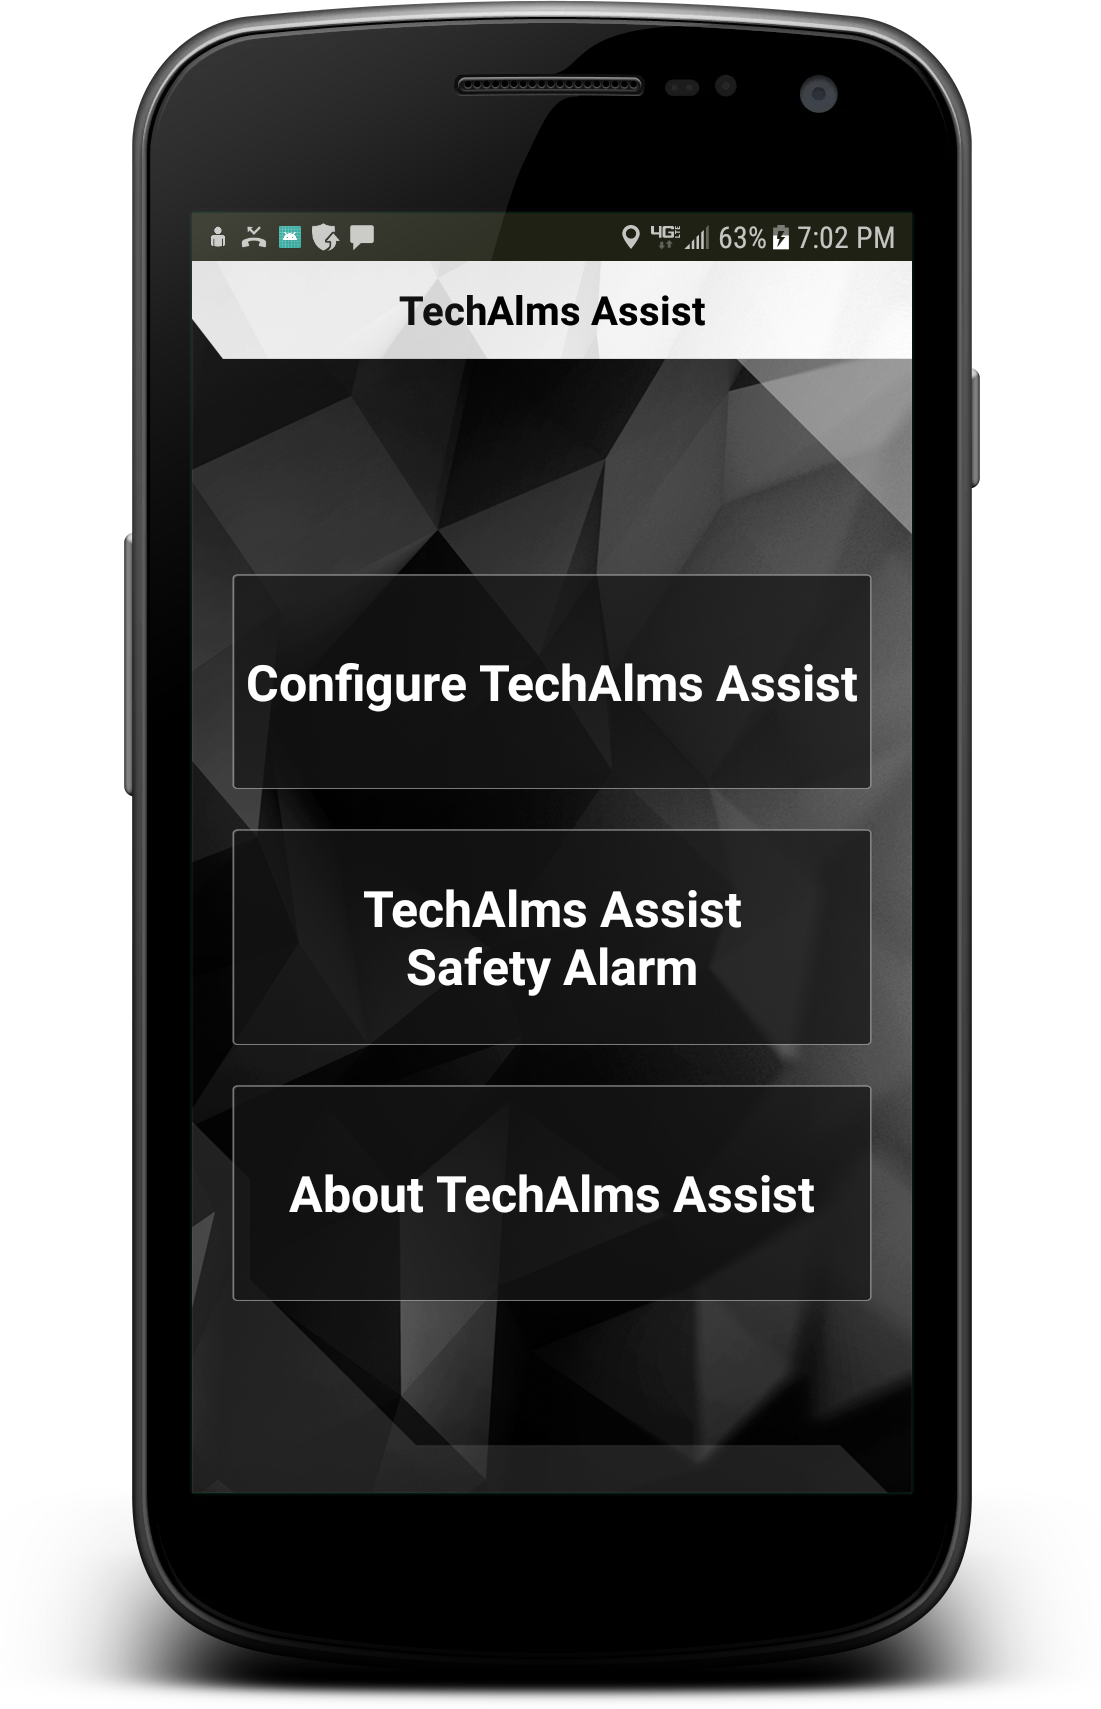
Step 3 - Learning the Home Screen
This is the home screen of the application. From here you can configure the "TechAlms Assist Safety Alarm", enter the "TechAlms Assist Safety Alarm", or read the “About TechAlms Assist" section of the application. Before you do anything, you will want to select “Configure TechAlms Assist”.
** If you try to select the “TechAlms Assist Safety Alarm” before configuring it in the “Configure TechAlms Assist” Section, you will be greeted with a popup telling you to first configure the Safety Alarm.

Step 4 - Configuring TechAlms Assist
When you select, “Configure TechAlms Assist”, you will be greeted by a popup asking you to allow TechAlms Assist to access the devices location. Select “Allow" to proceed with the configuration.
** We do not collect any information at all. Your location will not be sent to anyone except the contacts you select in the following steps.
Step 5 - Configuring TechAlms Assist
When you have allowed TechAlms Assist to access the devices location, you will be shown a generated text message, as well as a link which brings up your location on a map. The generated text message is user editable, however it is recommended that you leave it as the generated message.

Step 6 - Configuring TechAlms Assist timer
The timer is configurable from anywhere between 1 minute (01:00) and 9 minutes and 59 seconds (09:59). You can set the timer to what you feel comfortable with.

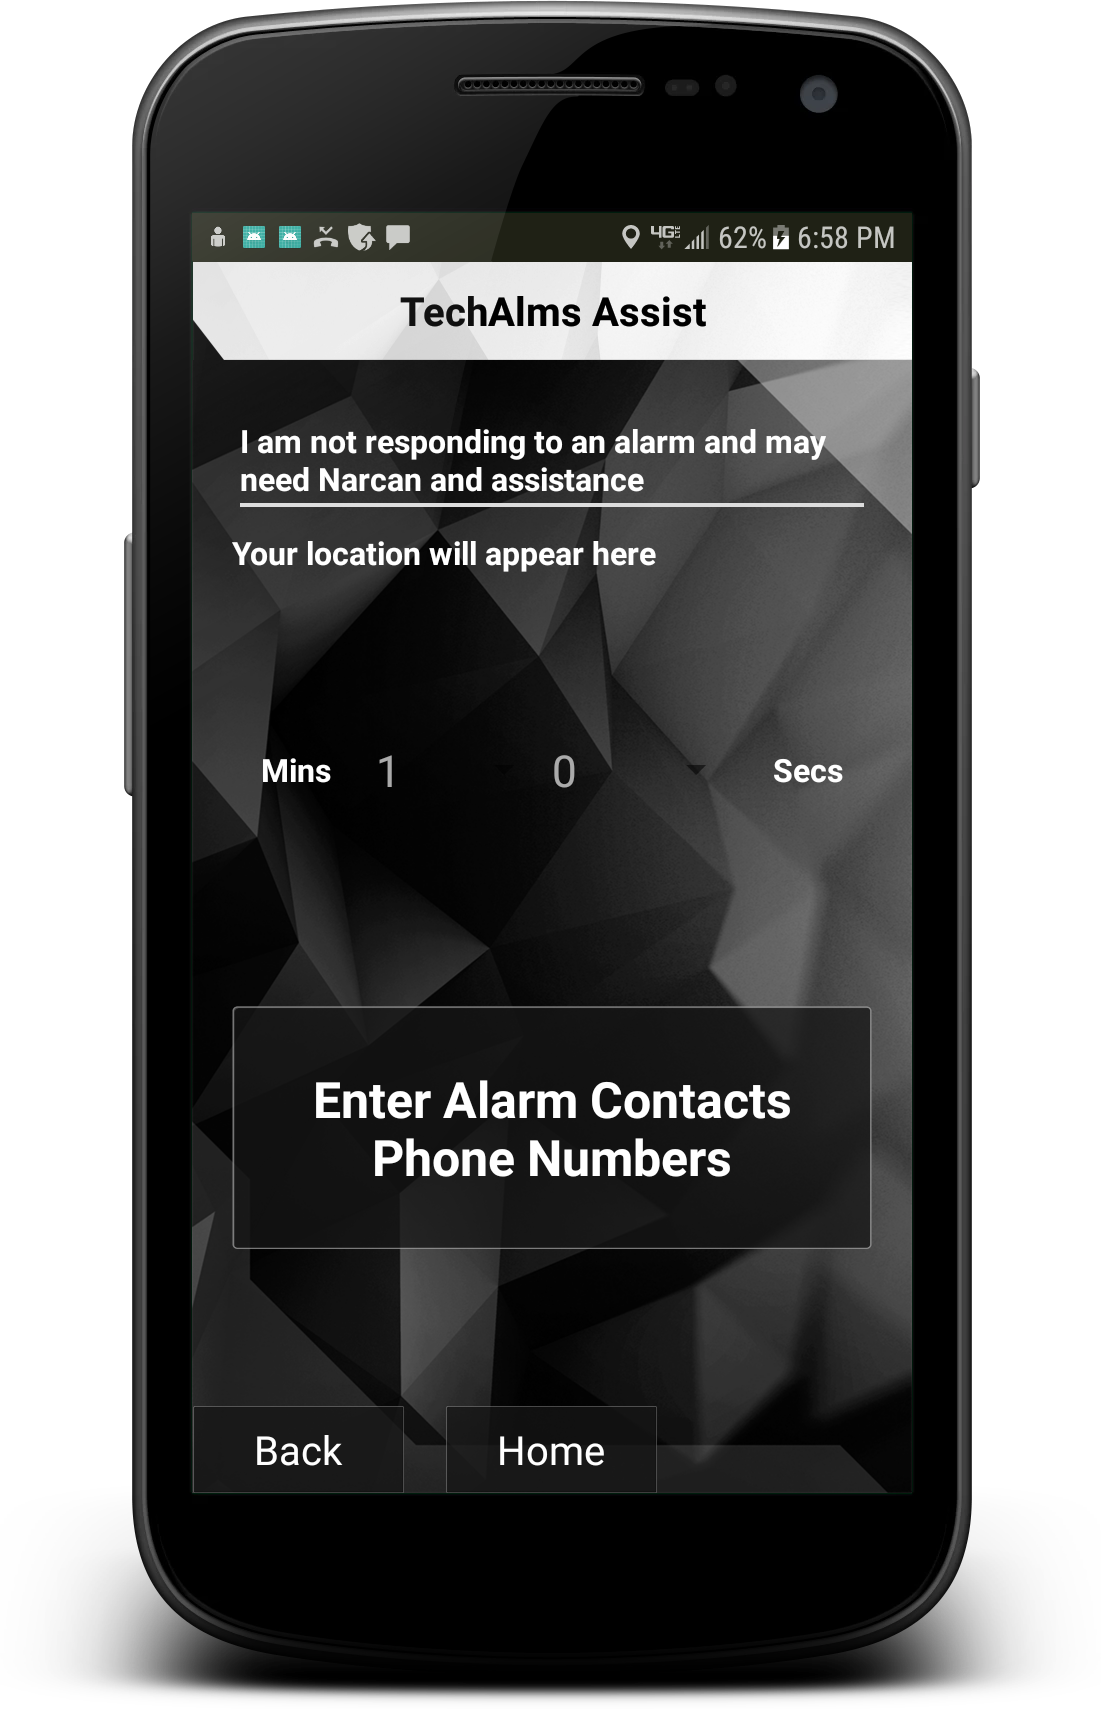
Step 7 - Entering the Alarm Contacts Phone Numbers
Once you have set the timer to a time you are comfortable with, select “Enter Alarm Contacts Phone Numbers”.

Step 8 - Entering the Alarm Contacts Phone Numbers
You may enter up to ten phone numbers for the application to contact when the alarm goes off. The phone numbers will receive the message and location hyperlink you saw in Step 5. As you can see in the screenshot, phone numbers can be entered in different formats.
If a phone number is not correctly entered, it will remain red. This means that phone number is not a properly formatted ten digit number and it needs to be corrected in order to work. Correctly entered phone numbers will turn black.

Step 9 - Entering the Alarm Contacts Phone Numbers
Once you have entered your Alarm Contacts Phone Numbers, select “Save” and you will see a screen stating, “TechAlms Assist Contacts Phone Numbers Saved”. After this, select “Home”, to return to the home screen.
Step 10 - TechAlms Assist Safety Alarm
Once the "Configure TechAlms Assist" section has been properly configured, return to the home screen and select “TechAlms Assist Safety Alarm”.

Step 11 - TechAlms Assist Safety Alarm
On your first time opening the "TechAlms Assist Safety Alarm", a popup will appear asking you to allow TechAlms Assist permission to send and view SMS (Text) messages. Select “Allow”, so that when the alarm goes off the message and location you saw in Step 5 will be sent to the contacts you entered in Step 8.

Step 12 - TechAlms Assist Safety Alarm
You will see a label asking, “Where are you?” With a text box which you can write in. Type where you currently are here.

Step 13 - TechAlms Assist Safety Alarm
If you do not enter anything in the text box, you will see a popup stating, “Please write something above”. GPS can not be totally accurate one hundred percent of the time and this text box will help make your location known if there is a GPS disparity.

Step 14 - TechAlms Assist Safety Alarm
After entering where you are in Step 12, right before you begin to dose, select “Start Alarm Timer”. This will begin the countdown from the time you set in Step 6.
** The message “No Service: The texts might not be sent” will appear if the phone you are using does not currently have a cellular connection.

Step 15 - TechAlms Assist Safety Alarm
After selecting “Start Alarm Timer” in Step 14, the countdown will begin. While the alarm is running, the “Home” button will be inoperable.
If the alarm is not running and you select “Home”, a popup will appear asking if you wish to return to the Home screen.
** To understand the “Cancel” function, refer to Step 19 below.
*** To understand the “Reset” function, refer to Step 20 below.

Step 16 - TechAlms Assist Safety Alarm
Once the alarm reaches under 1 minute (01:00), the screen will begin to alternate between a red and white flash. An audible alarm sound will also play. This alarm sound will override all volume and mute settings on the phone and will continue until the “Send All Well Notice” in Step 17 is selected.

Step 17 - TechAlms Assist Safety Alarm
When the countdown timer reaches zero (00:00), the message and location hyperlink you saw in Step 5 will be sent to the contacts you entered in Step 8.
When the situation is resolved, select “Send All Well Notice”. This will send a text message saying, “All is well” to the contacts you entered in Step 8.

Step 18 - TechAlms Assist Safety Alarm
When you select “Send All Well Notice” in Step 17, you will be greeted with a message stating “All Well Texts sent to TechAlms Assist contacts”. From here you may select “Home” to return to the home screen.

Step 19 - TechAlms Assist Safety Alarm “Cancel”
If you want to cancel the Safety Alarm, you can select “Cancel”. A popup will appear asking if you wish to cancel the alarm timer. Selecting “Yes" will return you to the same screen you see in Step 12. Selecting “No” will allow the alarm to proceed.
The alarm will still be counting down while the “Cancel” popup is open. It will only stop if you select “Yes”.

Step 20 - TechAlms Assist Safety Alarm “Reset”
Selecting “Reset” while the Safety Alarm is running, will reset the alarm to the original time you selected in Step 6.
This concludes the TechAlms Assist How-To Article.
This article is designed as a simple, in depth tutorial on how to configure and use the TechAlms Assist application. If you have any questions, please refer to the instruction video in the link below.